Showing posts with label Halloween crafts. Show all posts

Friday, October 5, 2012

Frank and Jack

Paper plates are one of my favorite materials to use when making crafts with toddlers. They make a sturdy surface to paint and glue on and we always have some hanging around. 

For "Frank", Stella painted the plate green and I cut the top to make his flat head. I then put some glue on for Stella to add the eyes and other parts that I cut from construction paper. Easy peasy!
"Jack" was made the same way only this time, I let Stella use a glue stick to attach the face. I don't often let her use a glue stick because sometimes, she likes to use it as lipstick. But, this time she DIDN'T glue her lips together.


Friday, October 7, 2011

An Oldie But Goodie-Halloween Candle Holders

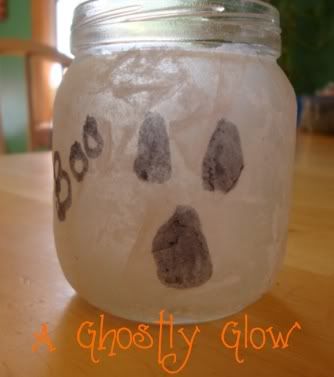
Halloween decorating is so much spookier when there are flickering candles around. Here is a fun candle holder that you can make to create a Ghostly Glow!


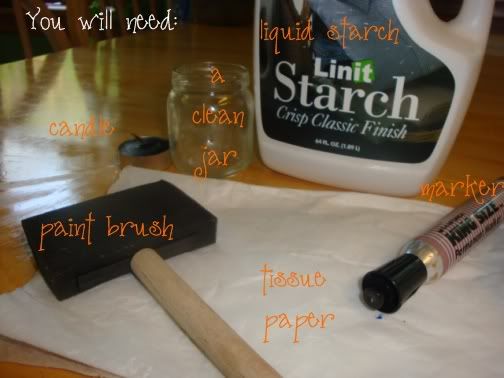
Let's get started!


My kids love tearing up paper!


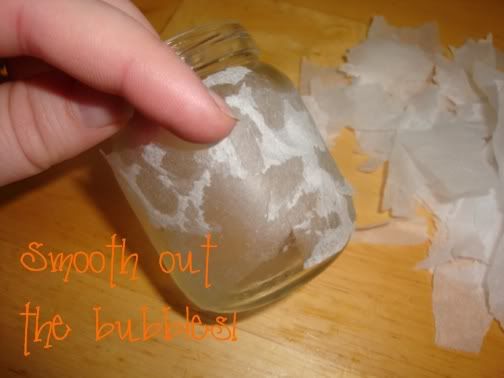
This might get a little sticky!


Cover the entire jar with tissue paper!


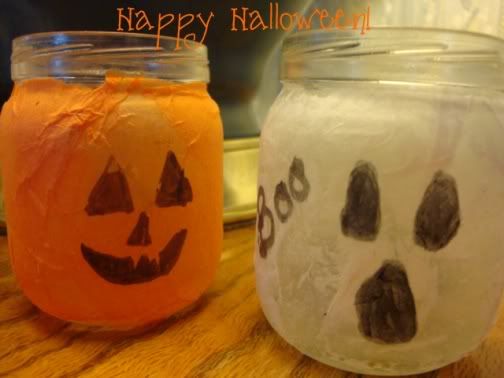
When it's completely covered, allow your jar to dry. After that, you can draw a ghost face and add a candle. We used the same technique to make Jack O' Lanterns as well!


Monday, October 5, 2009

Create a Ghostly Glow

Halloween decorating is so much spookier when there are flickering candles around. Here is a fun candle holder that you can make to create a Ghostly Glow!
Let's get started!
My kids love tearing up paper!
This might get a little sticky!
Cover the entire jar with tissue paper!
When it's completely covered, allow your jar to dry. After that, you can draw a ghost face and add a candle. We used the same technique to make Jack O' Lanterns as well!

Tuesday, October 21, 2008

Egg Carton Bats


Here is an easy bat project to do for Halloween.


For this project you will need: an egg carton, black paint and googly eyes.

First cut the egg carton down to just three sections. Cut the two end sections to resemble wings.

Put on a paint shirt and paint it black. I sure am glad I put paint shirts on the girls today. Though we paint an awful lot I think sometimes Mady can not control herself. Today was one of those days. I decided to do the dishes while they painted and when I turned around Mady painted all the way up to her elbows. Solid black. Thank God kids are washable:)


Last I added eyes and a pipe cleaner to hang it. I kept ours pretty simple, but you could add some fangs if you wanted to.


Thursday, October 16, 2008

Salt Dough Ghosts


I found these ghosts and I just knew I had to do them. They were a little hard for the little girls to do, but Aaron really enjoyed doing this project. You can find the instructions here.

Wednesday, October 8, 2008

Torn Paper Candy Corn

These candy corn are very simple just like our torn paper Jack O' Lanterns. We can't have Halloween without candy corn!
First, have your child tear pieces of orange, white, and yellow paper. While they tear the paper, cut out the candy corn shape to glue the pieces on.

Next, divide the candy corn into sections and color the areas as a guide for your child to glue on. Then, allow your child to fill in those areas with the torn paper.
Now you have a very sweet candy corn without the sugar rush:)

Monday, October 6, 2008

Handprint Spiders


Spiders can be adorable! As long as they are made from your little one's hand prints and not crawling around your house.

For the first step of this project, we did some marble painting to create the look of a spider's web.

I then painted the kid's hands, except for the thumb.

Press your child's hand on the paper.

Paint the other hand as well and press it on the paper facing the opposite direction.

Last, we added reinforcement labels for the eyes. Aren't they sweet?

Friday, October 3, 2008

Torn Paper Jack o' Lanterns

This is a simple project and a fun alternative to paint.
You will need: paper plates, construction paper, and glue
The fun begins with the tearing of the paper (remember to stick your tongue out like Mady).

Next, glue the pieces of paper to the paper plate.

Now add eyes, a nose, a mouth, a leaf, and a stem.
Here are the finished Jack o' Lanterns!

Monday, September 22, 2008

Footprint Ghosts

I know it may be a little early to decorate for Halloween, but I love it so much that I just can't wait any longer. Every year since my kids were little, I have made these adorable ghosts with their feet.

1. Paint the bottom of your child's foot. It must be done with a paint brush because that is what causes the most giggles:)

2.Press your child's foot down on black construction.

3.Add some eyes and a mouth. Now, you have the cutest little ghosts ever.
Related Posts Plugin for WordPress, Blogger...